Not everyone wants to spend $15-$30 for something as simple as a strap. If you are like me hammock straps go missing all the time. Instead of having to buy new straps every time I simply make my own DIY hammock straps.
Learn step by step how to make hammock straps depending on what you may have laying around the house!
Paracord Hammock Straps
This method is what I use every time I need new hammock straps. What makes this design great is there is no need to use exact same materials. Most people have similar materials laying around the house that are an easy substitute.
This paracord design is the simplest and cheapest method to make your own straps as it requires very few and cheap materials. As well as an easy-to-put-together method.
Materials-
4-8” long 1-2” wide thick fabric
Paracord
Carabiner
Thread and a needle
Find out how long you want the straps to be.
Cut the paracord at double the length you want to straps to be
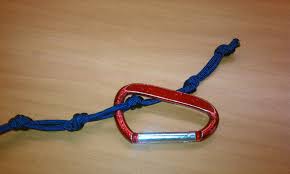
Fold the paracord in half so the two ends are touching
Tie a square knot with the two ends. Cut and burn the excess after the knot is tied.
Sow the fabric onto the opposite end of where the knot is. 3-5” inches in from the loop
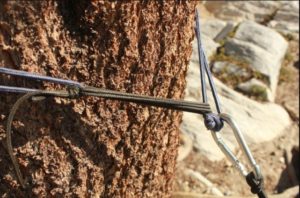
Finally, tie knots in the long part of the rope to make sectioned links in the strap. This will allow you to have adjustable lengths. This is important because rarely will trees be the perfect length apart for your hammock.
How to Use Hammock Straps
Straps use friction on the tree to hold the weight of the hammock. The design and technic is so simple that some people doubt the strength of hammock straps to properly hold their weight.
There is no need to fear. When properly set up hammock straps are rated to hold hundreds of pounds.
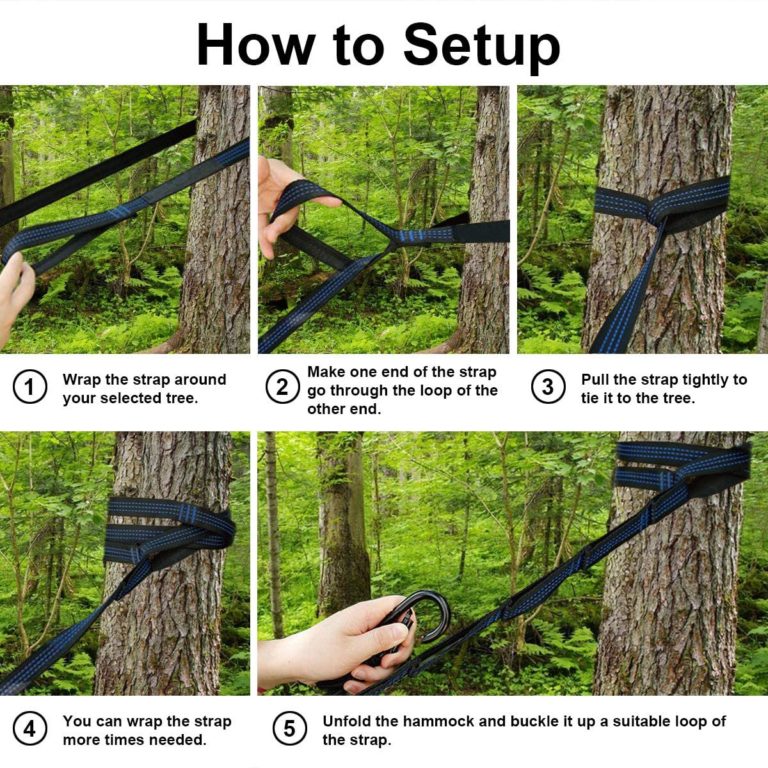
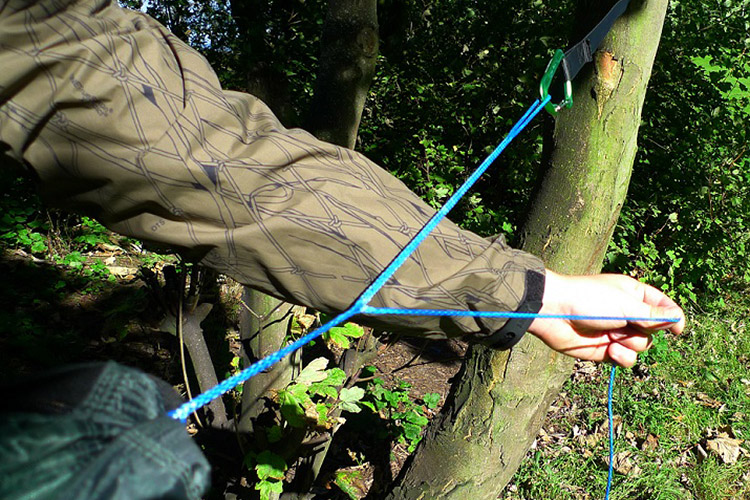
Begin by wrapping the strap around the tree and hold both ends on the side of the tree where the hammock is going. Then put one end of the strap through the stand-alone loop and pull it all the way through till it is tightly wrapped around the tree. Repeat the process with the other strap on a tree that is 7-13 feet apart.
From there use the carabiner on each end of the hammock to connect to the strap. When one end of the hammock is connected to the staps pull it to the next strap and attach it to the farthest posable loop so the hammock is tight. You may want to adjust what loop each end is in till you find the best comfort point for you!
Key Parts of a Hammock Strap
Learning the three parts of what makes a strap and allows it to hold up a hammock can help you build your own unique individual strap from what may be laying around the house.
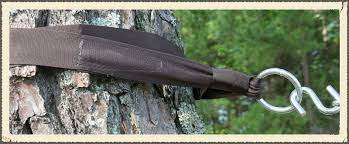
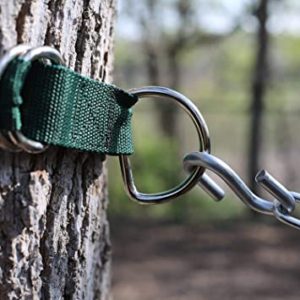
Webbing
The webbing is what wraps around the tree. This material should be long enough to wrap around average size trees. As well as an inch or two thick because it needs the width to provide friction against the tree which holds you up. Durable material is recommended because this part of the strap goes through the most wear and tear.
Sling
The sling is a smaller lightweight piece of rope/string that is rated to hold about 200-400 pounds. This is the middle point between the webbing and connector. Usually, this is the part where you will want to make multiple loops so you have adjustable length when setting up the hammock. Personally, I find paracord the best fit for this part.
Connector
This part will connect the strap to your hammock. If you have loops on your DIY strap a carabiner is my recommendation as it is strong and simple to use. If you are creative and resourceful there are many other things that will work but it all depends on the hammock and how you have built the strap.